So I've finally decided to be productive and post another tutorial. This one will be better because it's more of a documentation, not just a tutorial. I'm writing and taking pictures of what I'm doing as I'm doing it and not afterwards. The reason I didn't do that before is because I had already done those before deciding to make a tutorial. Also, the Aeroquad tutorial on their wiki might be easier, so go there if I don't explain it clearly enough or if I'm more boring-er than them.
1. Installing the Arduino Software:
First, I'm going to download the software for the Arduino, which can be found here. I chose my operating system, which is Windows. You need to download a zip file. If you don't have a program that can unzip these, I found a good one here. Be careful when installing it and look carefully at every page. Don't let them trick you with sneaky text into installing some crappy useless Bing toolbar. I unzipped the file into a folder called "quadcopter".2. Downloading the AeroQuad Code:
I went here and downloaded the configurator as well as the code and put them in the same folder as the Arduino software. The links should be the two at the bottom: "AeroQuad_v2.4.2.zip" and "AeroQuadConfigurator_v2.7.1.zip". Simply put, the code tells the quadcopter what to do and the configurator troubleshoots if something doesn't work. My folder now looks like this:3. Testing the Arduino:
To connect the Arduino, I needed the USB A to B cable, which looks like this:By the way, I definitely took that picture, and my desk definitely is that blindingly perfect and white. I just opened the Arduino.exe in the folder I unzipped. AeroQuad recommends that I test the Arduino out with the "blink" code first, so I will. Basically, this just blinks an LED on the Arduino every second.
It opens another window with code on it. It looks like Java, but somewhat simpler. I went to the tools tab, then to board, and chose "Uno", because I have the Arduino Uno. The program can't find my Arduino because it can't find the com port. This told me to go to Control Panel>System and Security>System, so I did. I opened the device manager, found the Uno, and browsed for the driver, which was in the folder arduino-0022>drivers. I chose the folder and the drivers were installed. Now on the device manager, this is what I see:
I can finally get back to testing. I chose the now-available com port:
As you can see, uploading now works and I see the LED blinking on for one second, then blinking off for one. Now to the real code.
4. Editing and Uploading the Code:
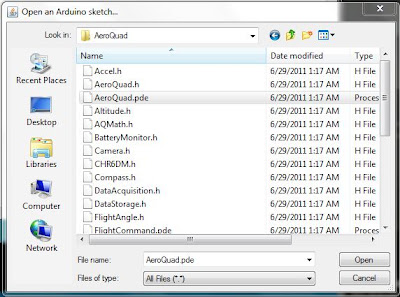
I needed to open the AeroQuad code to start with, so in the Arduino program, I went to File>Open>...>AeroQuad>AeroQuad.pde:This is extremely simple. Just uncomment whatever you're using (take away the "//"), so I uncommented "#define AeroQuad_v18" since I'm using an Arduino with the AeroQuad 1.9 shield (which is essentially the same as the 1.8).
The flight configuration is how the propellers are arranged relative to the front of the quad. The basic ones are X and +. X is meant for fpv quads, or quads with cameras on them so the propellers aren't blocking its view, but it seems more complex for me, and I'm not using a camera, so I chose the + configuration:
There are three optional sensors: the barometer, magnetometer, and battery monitor. I don't have either of the first two, and I'm not using the battery monitor until I'm already finished, so I uncommented only the last choice:
The next section has to do with flight angle calculations. Basically, you uncomment the ARG line if you don't have a magnetometer and otherwise leave it. I don't have a magnetometer, so I uncommented it:
The remainder of the user-definition section is about camera stabilization and stuff that I don't care about (currently), so I'm done!
I uploaded the code to the Arduino with no problems. If you need any help, comment.


No comments:
Post a Comment