So, as I said before, I'll be posting the first tutorial today. For all that don't know what a quadcopter is, it's like a remote control helicopter, but while a helicopter has a complex rotor that needs to tilt and move in complex ways, the quad only needs four fixed propellers. I want everyone to know before I start that most of this will be based off the tutorials at AeroQuad. I'll just be focusing a lot more on the simple things that beginners like me don't understand and that the tutorials ignore, as they assume anyone reading them is at least slightly experienced. I'm not. I'm also not doing general tutorials. These are specifically to build exactly what I will be building.
There are several different places to get these parts from, and most if not all of it can be bought online. Every time I buy something else, I'll update this post. So far, I've gotten most of my parts from AeroQuad and HobbyKing, and some things from RadioShack, Ebay, and Home Depot. I'll go in order.
AeroQuad
The most important thing you get from AeroQuad is the Arduino and its shield. You don't actually have to get the Arduino from there, but it's easier unless you already have one because it ends up being less orders on your part.1. Arduino Uno: This is basically the brain of the quad. You upload the code (which is open source thanks to AeroQuad, by the way) and connect the antenna and ESCs. It gets input from the antenna and sensors and tells the four individual speed controllers what to do. The Arduino Uno is one of the simplest ones so it's good for beginners. $29.95
2. AeroQuad Shield 1.9: This is placed on top of the Arduino Uno with all the sensors so people like me don't have to worry about the complex connections they would have to have otherwise. It comes with everything you see, but the shield is slightly modified to fit resistors, which are not shown in the picture (the picture is of the 1.8 shield. $24.95
3. Gyroscope Sensor: This is one of the sensors you will attach to the shield. It senses the tilt of the quad so it can tell whether or not it's level. $49.95
4. Accelerometer Sensor: This is similar to the gyro, but instead of sensing tilt, it senses acceleration, so it can tell which direction the quad moves, and therefore, keep it stable in midair if needed. $29.95
5. Stackable Headers: You solder these to the edges of the shield so you can place it on top of the Arduino. If you have other shields, those can be stacked on top of this as well. $4.95
6. Breakout Pins: These are soldered to the shield for the sensors and plugs for ESCs to connect to. The shield comes with them, but I've forgotten whether I've needed these. Don't feel inclined to buy these. $2.50
7. USB A to B Cable: You probably already have one of these, but if you don't you might as well buy it here. You could also probably get one from Best Buy, Radio Shack, Ebay, or any number of other places. This cable is to connect the Arduino to your computer. $3.95
8. Reciever Cables (6-7x): These are used to connect the separate antenna slots to the shield. You need one for every slot, and I think that's 6, but you may need an extra. I've forgotten. $1.50 each
9. Propellers and Pusher Propellers: You don't have to get these specific propellers, but they must counter-rotate. You will need at least two of each, but from what I've read these break frequently and you will want spares. $3.00 each propeller, $4.00 each pusher propeller
HobbyKing
Before I start with this section, I want to say that since most of the things you buy from HobbyKing ship from Hong Kong, the shipping will be very expensive, probably around $50.1. Hextronik 24 gram Outrunner Motor (4x): These will be the motors that you put your propellers on. They're very light compared to other options, so the quad should be under a kilo. $8.53 each
2. 10amp ESC (4x): These connect the motors to the Arduino. They are given a number between -1 and 1 I think and based on that number tell the motor they're connected to how fast to go. $9.24 each
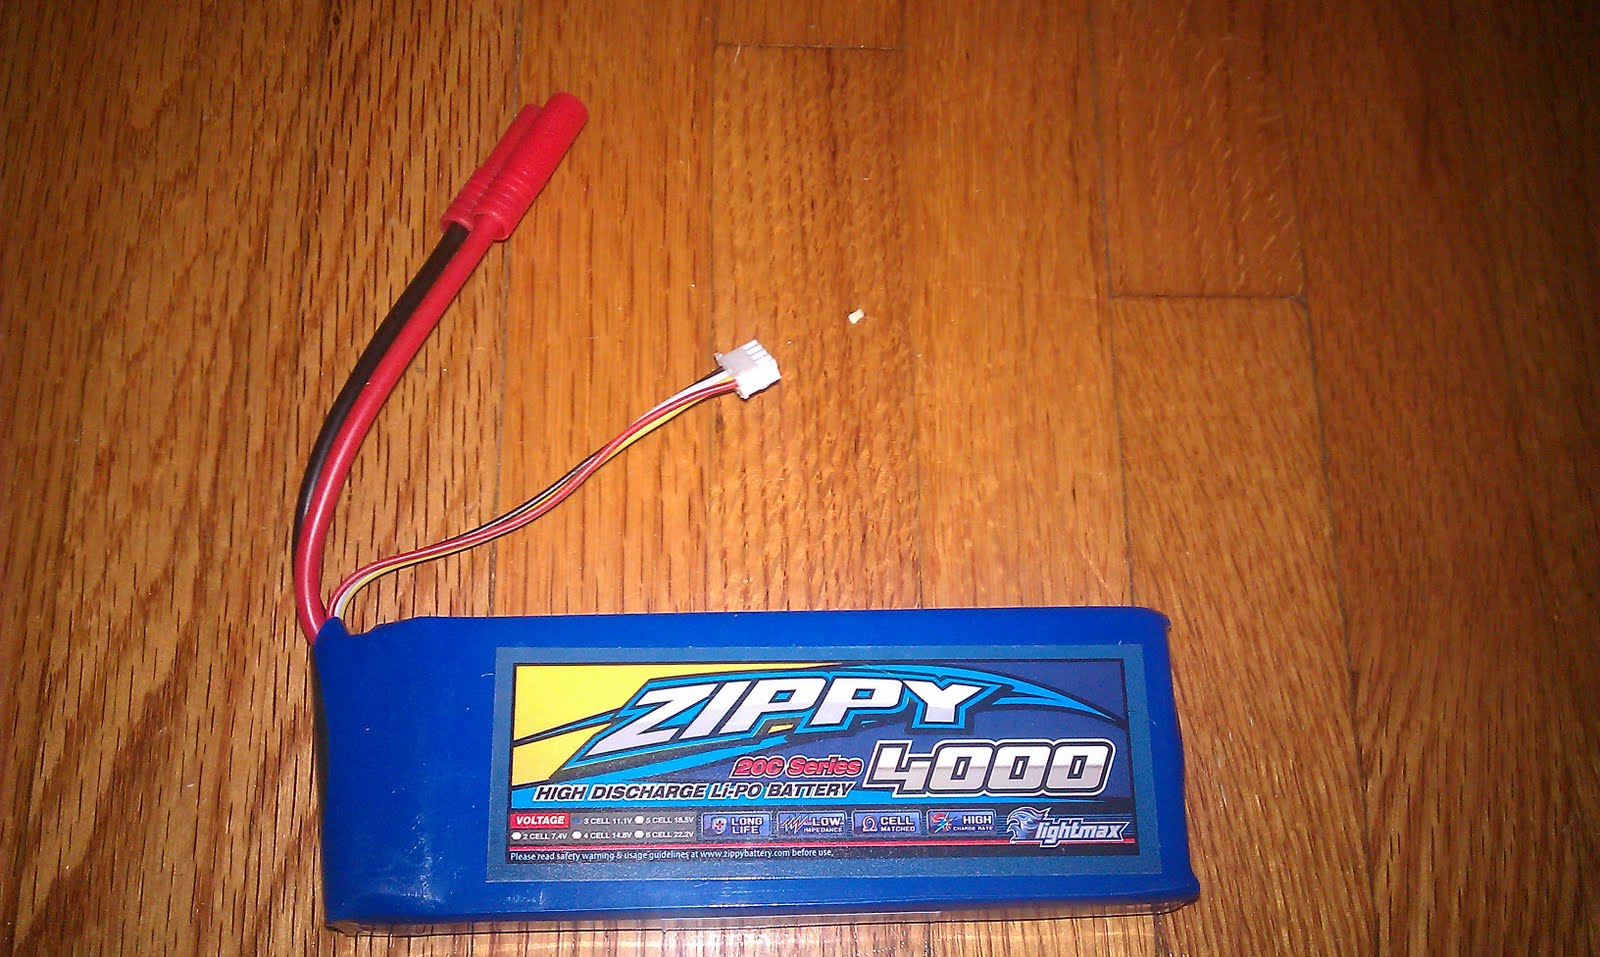
3. Battery: If you don't know what this is for, leave... now. $19.99
4. Transmitter: This is basically the remote control. It transmits to the antenna, and the antenna gives information to the Arduino. It's a cheap alternative to the $300 one recommended by AeroQuad. The only difference is that theirs has 9 channels, not 6, so you can use more switches/buttons and stuff, but you don't need more than 6, and theirs has a screen that makes it easier to program the ESCs. With this one, you need to know how to use the joysticks to tell the ESC, which I still have yet to learn. $22.99
5. Bullet Connectors: AeroQuad recommends buying these off Ebay, which I did, but only because I didn't realize that I could have gotten them from HobbyKing, and because of that I need another one. These connect your main power supply to the battery, and you may want another one for charging the battery. This comes with ten, but you only need a couple. $3.58
6. Balancer/Charger: This is to charge, discharge, or balance your battery. Discharging and balancing are used to optimize battery life, especially when you're storing one, but I'm not focused on learning how to use those features just yet. This is basically a computer that charges your battery based on what kind it is and its features (voltage and stuff) $22.99
7. Power Supply: This gives power to the charger, but you may already have one for laptops and other devices. The one needed is 12 volts and 5 amps, so before using one you already have, make sure it's the right kind. $9.99
8. Battery Monitor: Not required. This checks on the juice in the battery, and if it gets below a certain point, it buzzes and blinks. This is only if you're flying it for a long time, but if it's far away, you may not hear or see it. I won't be putting it on until after I'm already done, so there won't be anything about it in these tutorials unless I add one later on. $3.99
General/Locally Found Parts
These are the things that you can't get from HobbyKing or AeroQuad and are probably scattered around the house or easily found at stores like RadioShack and Home Depot.1. 18 and 16 Gauge Wire: This is necessary to have for your power distribution system. The 16 gauge will come directly off the battery and the thinner 18 gauge wire will branch off to the separate ESCs and the Arduino to give them all the power they need. You will probably only need a few feet of each. Most experienced people would tell you to get red and black, but I'll only be using one color although I may use electrical tape to color-code the positive and negative wires.
2. 15 and 30 Watt Soldering Irons: These are to solder wires together for your power distribution as well as solder your Arduino's shield together. The lower wattage is for smaller things like the Arduino while the 30 watt would be for things like the power distribution. You can get soldering irons with both settings built in. This is the kind that I have. I got mine from RadioShack.
3. .032" and .062" Rosin Core Solder: If you have a soldering iron, you obviously need solder. The thicker solder is for the power distribution, which is why you need a hotter soldering iron and the thinner is for the shield. I don't know if rosin core solder is required, but AeroQuad said to get that kind and RadioShack had it, so I got it.
4. General Tools: For any project like this, you need tools. You'll need things like wire cutters, wire strippers, allen wrenches, screwdrivers, and maybe a knife.
5. Scale: Since the motors on this quad are light, it needs to be under a certain weight, specifically around a kilo. Because of this you need something to weigh the parts. This can be a 20 dollar scale found at Wal-Mart or Target in the cooking section. Just make sure you are able to weigh in grams because no one uses the English system except for Americans. The metric system is much simpler and widespread. Believe me.
That's all for parts. You may have noticed I didn't mention anything about the frame. That's because I don't know how I'll build the frame yet. That's not important to me until I get everything else straight. I have to go now to get ready for bed and go to school tomorrow. My next tutorial will be something I've already done, soldering together the AeroQuad shield.